Introduction
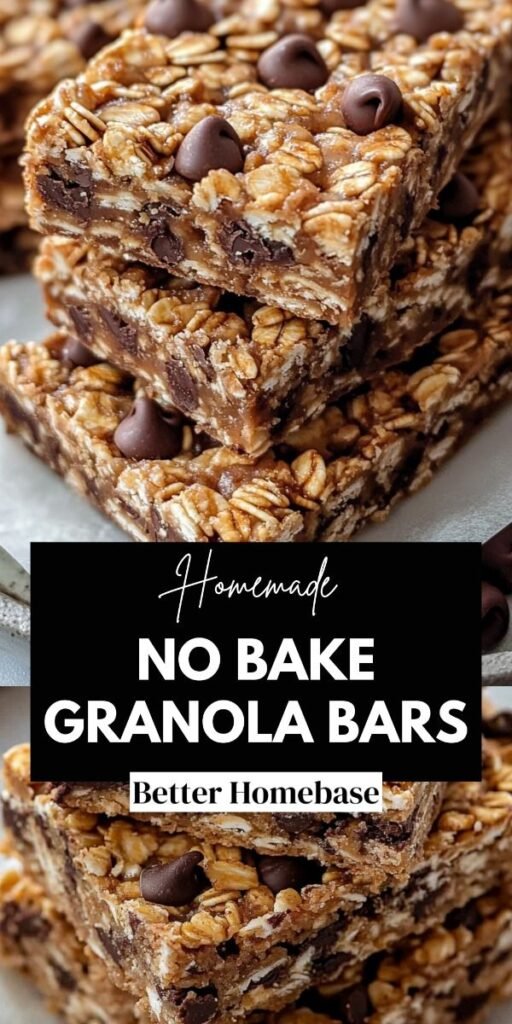
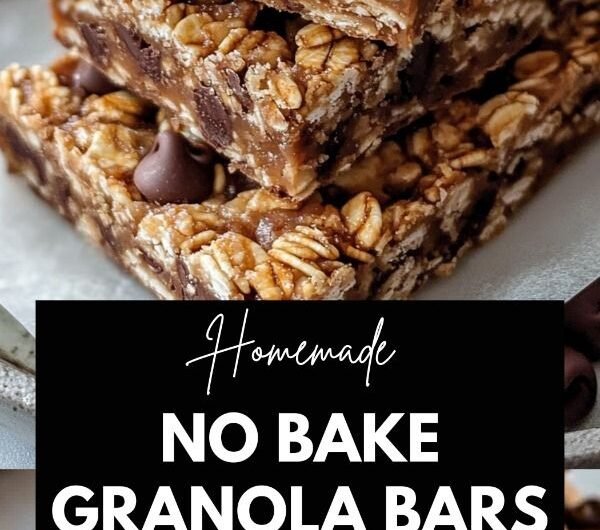
Ever wish you had a quick snack ready without turning on the oven? Homemade No Bake Granola Bars are one of those simple treats that feel cozy, homemade, and just right for busy days. They come together with basic pantry ingredients and set in the fridge instead of baking, which makes them perfect for warm afternoons, school snacks, or late-night cravings. I often mix them up when I want something sweet but still wholesome enough to grab during a hectic week. The texture is chewy, slightly crunchy, and easy to customize with whatever nuts or add-ins you already have at home.
Why You Will Love This Recipe
Tired of snacks that disappear too quickly or feel too processed? These bars give you something homemade that actually lasts through the week and tastes fresh every time you grab one. The mix of oats, nut butter, and a touch of sweetness creates a chewy bite that feels satisfying without being heavy.
Looking for something flexible enough for real life? Homemade No Bake Granola Bars fit into lunchboxes, quick breakfasts, and afternoon snack breaks with ease. They’re budget-friendly, require no oven time, and can be adjusted depending on what you have in your pantry. Whether you make a small batch for a couple of days or a larger tray for the whole family, they stay reliable, simple, and easy to store.
Ingredients
Tip: Use thick, creamy nut butter for better binding and a chewy texture.
- 2 cups rolled oats
- ½ cup peanut butter or almond butter
- ⅓ cup honey or maple syrup
- ¼ cup mini chocolate chips
- ¼ cup chopped nuts (almonds or walnuts)
- 2 tablespoons chia seeds
- 1 teaspoon vanilla extract
- Pinch of salt
For 2 people: use half the ingredients.
For more than 4: double everything and press into a larger pan for even setting.
Instructions
Step 1: Preparation – 40 words
Wondering how to start without making a mess? Line a small baking pan with parchment paper so the bars lift out easily later. Measure all ingredients ahead so mixing feels quick, especially if you are making a smaller or larger batch.
Step 2: Main Cooking Process – 40 words
Not sure how to get everything to stick together properly? Warm the nut butter and honey slightly until smooth and easy to stir. This helps coat the oats evenly. Smaller batches mix quickly, while larger ones may need extra stirring time.
Step 3: Combining Ingredients – 40 words
Worried about uneven texture in every bite? Pour the warm mixture over oats, nuts, and seeds, then stir until everything looks coated and sticky. Add chocolate chips last so they stay slightly firm. Larger batches may need mixing in sections for balance.
Step 4: Finishing & Final Simmer – 40 words
Not sure when they’re ready to slice? Press the mixture firmly into the pan so it holds shape, then refrigerate until firm. Smaller portions set faster, while larger trays may need extra chilling time before cutting into clean, neat bars.
Why This Recipe Works for Busy Days
Need something you can grab without thinking in the morning rush? These granola bars store easily in the fridge and hold up well through the week. They’re perfect for meal prep because one batch gives you multiple snacks ready to go. You can also pack them for school, work, or travel without worrying about mess or spoilage.
Tips & Tricks
- Ever had bars fall apart when you cut them? Press the mixture firmly into the pan using the back of a spoon so it compacts well. Smaller batches need less pressure, while larger ones require extra firm pressing so every bar holds its shape neatly.
- Wondering why your bars feel too dry? The balance of wet and dry ingredients matters more than you think. If making a smaller portion, reduce oats slightly. For larger batches, ensure the nut butter mixture fully coats every oat for better binding.
- Struggling with sticky mess while mixing? Lightly warming the nut butter helps it blend smoothly without clumps. Smaller portions mix quickly in one bowl, while larger amounts may need a second bowl to prevent uneven coating.
- Want bars that slice cleanly? Chill them fully before cutting instead of rushing the process. Smaller pans set faster, while larger trays may need extra time in the fridge to firm up evenly before slicing into neat pieces.
Variations
- Want a protein-packed version? Add a scoop of vanilla or chocolate protein powder to the oat mixture before combining. Smaller batches need less powder adjustment, while larger trays may need a splash of extra nut butter to keep texture soft and chewy.
- Looking for a dairy-free vegetarian option? Stick with maple syrup instead of honey and use plant-based chocolate chips. Smaller portions stay light and simple, while larger batches remain easy to scale for family-friendly snack prep throughout the week.
- Need an ingredient swap? Replace peanut butter with sunflower seed butter for a nut-free version. Smaller servings mix quickly, while larger batches benefit from slightly more syrup to maintain the same sticky, chewy consistency throughout the tray.
- Want extra flavor depth? Add cinnamon, cocoa powder, or shredded coconut to the mixture before pressing it into the pan. Smaller batches only need a light touch of spice, while larger ones can handle stronger flavor layers more easily.
Serving Suggestions
- Morning Grab-and-Go Snack
Need something quick before heading out? These bars pair perfectly with coffee or fruit for a simple breakfast. Smaller batches work well for a few days, while larger trays make busy mornings feel much more organized and stress-free. - Lunchbox Addition
Looking for an easy school or work snack? Wrap each bar individually for quick packing. Smaller portions suit light snack boxes, while larger batches help prepare multiple days at once without extra effort during the week. - Afternoon Energy Bite
Want something to keep you going between meals? Pair a granola bar with yogurt or fresh fruit for a balanced snack. Smaller servings feel light and quick, while larger batches keep everyone in the household stocked up. - Movie Night Treat
Need something sweet but simple for relaxing evenings? Serve the bars with warm drinks or light desserts on the side. Smaller portions suit quiet nights in, while larger batches are great for sharing with friends or family.
Storage Instructions
- Fridge Storage
Wondering how long these bars stay fresh? Store them in an airtight container in the fridge for up to one week. Smaller batches stay neatly stacked, while larger ones should be separated with parchment paper to prevent sticking and keep texture fresh. - Reheating
Not sure if they need warming? These bars are best enjoyed cold or at room temperature. If slightly firm from the fridge, let them sit for a few minutes. Smaller portions soften quickly, while larger trays naturally adjust after a short rest. - Freezing
Want to make them ahead for longer storage? Wrap individual bars and freeze for up to two months. Smaller batches thaw quickly for single servings, while larger batches should be portioned before freezing for easier grab-and-go use later. - Make-Ahead Tips
Planning snacks for the week ahead? Prepare the mixture and press it into the pan the night before. Smaller trays set overnight easily, while larger ones may need a full chilling cycle for best slicing and texture.
Recipe Timing
Prep Time: 10 minutes
Cook Time: 0 minutes
Rest Time: 2 hours
Total Time: 2 hours 10 minutes
Nutrition Information (Approximate)
Each serving contains around 180–230 calories depending on ingredients used. Protein ranges from 5–8g per bar, with healthy fats from nut butter and fiber from oats. Values are estimates and may vary based on portion size and ingredient choices.
FAQs
Can I make these ahead of time?
Yes, they store well in the fridge and are great for weekly meal prep.
Why are my bars falling apart?
They may need more pressing or a little extra nut butter for binding.
Can I use quick oats instead of rolled oats?
Yes, but the texture will be softer and less chewy.
Why are my bars too sticky?
Too much honey or syrup can make them overly soft after chilling.
How long do they last?
They stay fresh in the fridge for about a week when stored properly.
Can I change the sweetness?
Yes, reduce or increase honey or syrup depending on your taste and batch size.
Conclusion
Homemade No Bake Granola Bars are the kind of recipe that quietly becomes a weekly habit once you try them. They’re simple, flexible, and easy to keep in the fridge for those moments when you need something quick and homemade. You can change the mix-ins, adjust the sweetness, or scale the batch depending on your household size. Whether you make a small pan for a couple of days or a larger batch for the whole family, this is one of those recipes that always feels useful without asking for much effort.
Homemade No Bake Granola Bars
4
servings10
minutes230
kcalDescription:
Chewy, wholesome granola bars made with oats, nut butter, and simple pantry ingredients. No baking needed, just mix, press, and chill for an easy homemade snack.
Ingredients
2 cups rolled oats
½ cup peanut butter or almond butter
⅓ cup honey or maple syrup
¼ cup mini chocolate chips
¼ cup chopped nuts
2 tablespoons chia seeds
1 teaspoon vanilla extract
Pinch of salt
Directions
- Line a small pan with parchment paper.
- Warm nut butter and honey until smooth.
- Mix oats, nuts, seeds, and chocolate chips in a bowl.
- Pour warm mixture over dry ingredients and stir well.
- Press firmly into the pan.
- Refrigerate for at least 2 hours until set.
- Slice into bars and serve.