Introduction
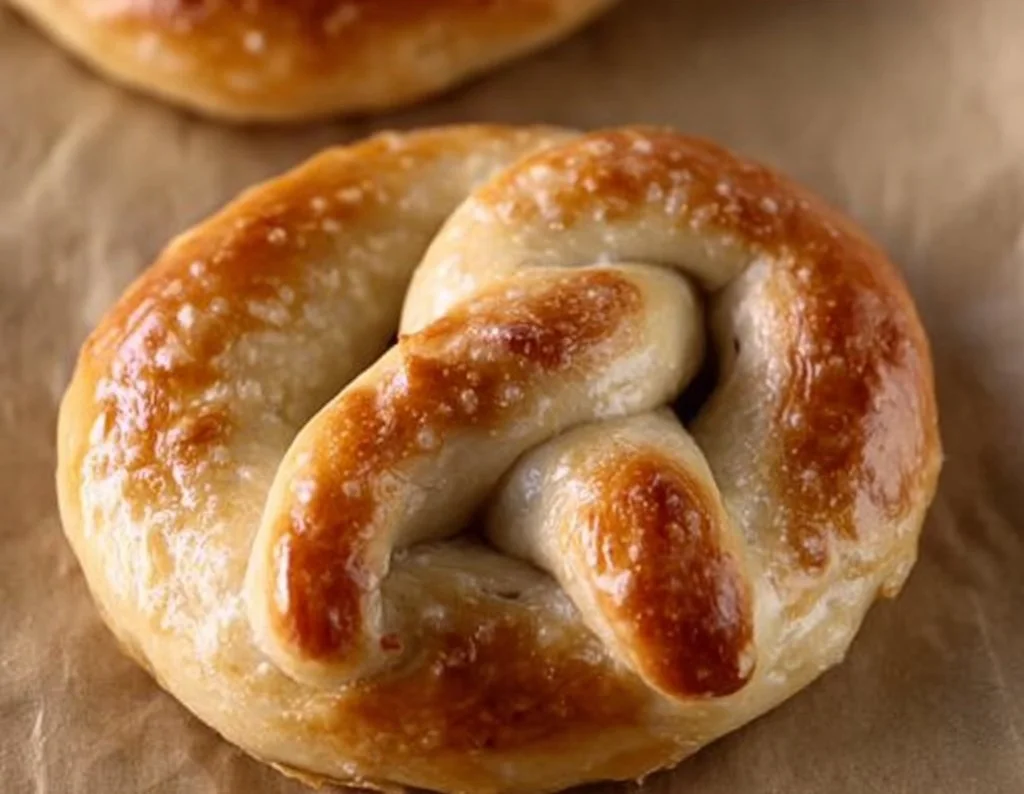
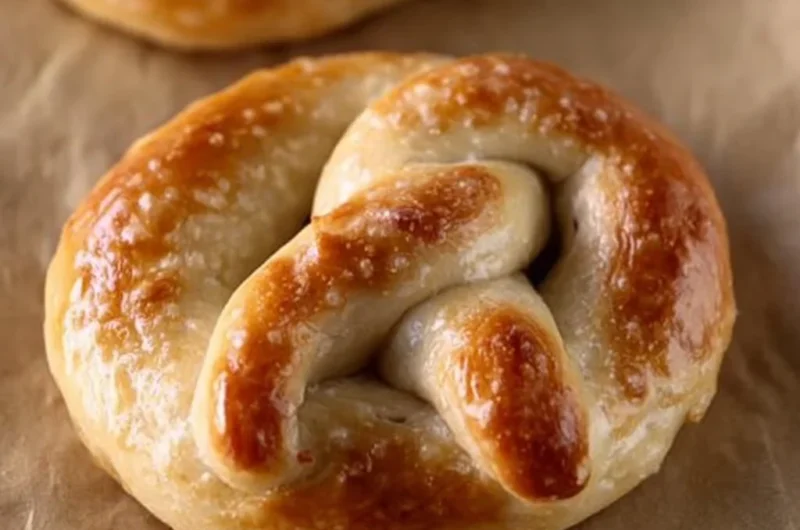
Looking for a delicious way to use up extra sourdough discard? Sourdough Discard Soft Pretzels are a cozy homemade treat with a soft, chewy center and a beautifully golden crust. They bring that classic pretzel flavor without requiring complicated techniques or specialty ingredients. Whether you’re planning a family movie night, need an afternoon snack, or want something comforting on a chilly evening, these pretzels fit right in. I often mix a batch whenever my sourdough starter jar begins to fill up with discard. Warm from the oven and sprinkled with salt, they feel special while still being easy enough for everyday baking.
Why You Will Love This Recipe
Need a homemade snack that feels rewarding without taking all day? These pretzels offer the best of both worlds: simple preparation and bakery-style results. The dough is forgiving, making it friendly for newer bakers, while the sourdough discard adds a subtle depth of flavor that makes each bite more interesting.
Want something that works for different occasions? They are cozy enough for a quiet evening at home and crowd-pleasing enough for gatherings. Sourdough Discard Soft Pretzels also freeze well, which means you can save extras for busy weeks. The ingredients are budget-friendly, and the recipe adapts easily if you’re cooking for fewer people or feeding a larger group. Even leftovers stay tasty when reheated, making this a practical recipe worth saving.
Ingredients
Tip: Use sourdough discard that smells fresh and slightly tangy for the best flavor.
- 1 cup sourdough discard
- 2¼ teaspoons active dry yeast
- ¾ cup warm water
- 1 tablespoon granulated sugar
- 3 cups all-purpose flour
- 1 teaspoon salt
- 2 tablespoons unsalted butter, melted
- 6 cups water (for boiling)
- 2 tablespoons baking soda
- 1 large egg, beaten
- 1 tablespoon coarse salt for topping
For 2 people, make about half the dough. For more than 4 people, simply prepare a larger batch using the same ingredient proportions.
Instructions
Step 1: Preparation
Not sure how to start the dough? Stir the warm water, sugar, and yeast together in a large bowl. Let it sit for a few minutes until slightly foamy. Mix in the sourdough discard, melted butter, salt, and flour until a soft dough forms.
Step 2: Main Cooking Process
Wondering when the dough is ready? Knead the dough until smooth and slightly stretchy. Place it in a lightly greased bowl, cover, and let it rise until puffy and nearly doubled in size. For smaller batches, rising time stays about the same.
Step 3: Combining Ingredients
Unsure how to shape pretzels neatly? Divide the dough into 8 equal pieces for 4 servings. Roll each piece into a rope and twist into a pretzel shape. Bring the water and baking soda to a gentle boil and dip each pretzel briefly before placing on a baking sheet.
Step 4: Finishing & Final Simmer
Want that classic golden finish? Brush each pretzel with beaten egg and sprinkle with coarse salt. Bake until deeply golden and fragrant. Larger batches may require baking in separate trays, while smaller batches usually finish a minute or two sooner.
Why This Recipe Works for Busy Days
Need a snack you can plan ahead for? The dough can be prepared earlier in the day and baked when convenient. These pretzels store well, freeze beautifully, and reheat quickly. They’re ideal for Pinterest users who love saving recipes for future weekends, family gatherings, or simple homemade treats without extra stress.
Tips & Tricks
- Having trouble getting a chewy texture? Avoid adding too much flour during kneading. A slightly soft dough bakes into a better pretzel. If making a smaller batch, keep the dough texture the same rather than making it overly firm.
- Wondering why your pretzels look pale? Do not skip the baking soda bath. That quick dip helps create the rich color and classic crust. For larger batches, boil only a few pretzels at a time to maintain water temperature.
- Concerned about uneven baking? Leave space between pretzels on the tray so heat can circulate. Crowded pans may cause uneven browning. If doubling the recipe, use multiple baking sheets rather than squeezing everything onto one.
- Trying to keep them soft longer? Let them cool completely before storing. Trapping steam can make the crust soggy. Smaller portions and larger batches both benefit from airtight storage once cooled.
Variations
Meaty Version
Want a heartier snack? Wrap thin slices of cooked turkey, roast beef, or ham around the dough before shaping. The savory filling adds extra richness while keeping the pretzels easy to serve. Adjust the filling amount naturally when making fewer or more servings.
Vegetarian Option
Looking for extra flavor without meat? Add shredded cheddar, mozzarella, or finely chopped spinach into the dough. The cheese creates a richer bite while vegetables add color and texture. This variation scales easily whether cooking for two or a crowd.
Ingredient Swap
Missing all-purpose flour? Bread flour works beautifully and creates a slightly chewier texture. You can also replace the butter with olive oil if needed. Just maintain the same proportions when adjusting the recipe size.
Flavor or Herb Boost
Want something a little different? Sprinkle garlic powder, dried rosemary, sesame seeds, or everything seasoning over the egg wash before baking. These simple additions create fresh flavor combinations and work well for both small and large batches.
Serving Suggestions
With Soup
Need a cozy dinner idea? Serve warm pretzels alongside tomato soup, vegetable soup, or creamy potato soup. The soft texture pairs beautifully with a warm bowl, creating an easy family meal that can be scaled for any group size.
Snack Board Style
Hosting friends or family? Arrange pretzels on a board with cheese cubes, fresh fruit, mustard, and dipping sauces. It creates an inviting spread that feels relaxed and welcoming while allowing easy adjustments for larger gatherings.
Sandwich Pretzels
Want to make lunch more interesting? Slice the pretzels in half and fill them with turkey, cheese, or fresh vegetables. This transforms them into satisfying sandwiches while keeping preparation simple and practical.
Movie Night Treat
Looking for a shareable snack? Serve pretzels warm with cheese dip, honey mustard, or garlic butter. They fit perfectly into casual evenings at home and can be doubled easily when serving more people.
Storage Instructions
Fridge Storage
Wondering how to keep leftovers fresh? Store cooled pretzels in an airtight container in the refrigerator for up to 4 days. Smaller portions can be packed separately for quick snacks, while larger batches should be divided to prevent excess moisture buildup.
Reheating
Concerned about losing that fresh-baked texture? Warm pretzels in the oven for a few minutes until heated through. This helps restore their chewy exterior better than microwaving. Reheat only the amount you plan to serve.
Freezing
Need a longer storage option? Freeze completely cooled pretzels in freezer-safe bags for up to 2 months. Separate layers with parchment paper if storing larger quantities. Thaw overnight or warm directly from frozen.
Make-Ahead Tips
Trying to save time later? Prepare and shape the pretzels ahead of time, then refrigerate before the baking soda bath. The next day, continue with the remaining steps. This approach works well for both small households and larger gatherings.
Recipe Timing
Prep Time: 20 minutes
Cook Time: 15 minutes
Rest Time: 1 hour
Total Time: 1 hour 35 minutes
Nutrition Information (Approximate)
Curious about the nutritional breakdown? Each serving contains approximately 240–290 calories and 7–10 grams of protein. These pretzels also provide small amounts of iron and B vitamins from the flour. Values are estimates and may vary depending on ingredient brands, toppings, and portion sizes.
FAQs
Can I make these ahead of time?
Yes. Shape the pretzels and refrigerate them before baking.
What is the most common mistake?
Skipping the baking soda bath often results in pale pretzels.
Can I substitute bread flour?
Yes. Bread flour creates a slightly chewier texture.
Why are my pretzels dense?
The dough may not have risen long enough before shaping.
How long do leftovers last?
They stay fresh in the refrigerator for up to 4 days.
How can I change the flavor?
Try garlic powder, herbs, cheese, or different toppings before baking.
Conclusion
Looking for a reliable way to use extra sourdough discard? These Sourdough Discard Soft Pretzels are simple, comforting, and wonderfully versatile. They fit into busy schedules, work for casual family meals, and store well for future snacking. You can easily customize the flavors, adjust the batch size, and experiment with different toppings to make them your own. Whether you’re baking a small batch for two or preparing extras for guests, this recipe offers plenty of flexibility. Fresh from the oven with a warm, chewy bite, it’s the kind of homemade treat that makes any day feel a little cozier.
Sourdough Discard Soft Pretzels
Course: Blog4
servings20
minutes15
minutes290
kcalSoft, chewy homemade pretzels made with sourdough discard and simple pantry ingredients. A cozy snack that’s easy to make, freezer-friendly, and perfect for sharing.
Ingredients
1 cup sourdough discard
2¼ teaspoons active dry yeast
¾ cup warm water
1 tablespoon granulated sugar
3 cups all-purpose flour
1 teaspoon salt
2 tablespoons unsalted butter, melted
6 cups water
2 tablespoons baking soda
1 large egg, beaten
1 tablespoon coarse salt
Directions
- Mix warm water, sugar, and yeast in a bowl. Let sit until foamy.
- Add sourdough discard, melted butter, salt, and flour. Mix into a soft dough.
- Knead until smooth. Cover and let rise until nearly doubled in size.
- Divide dough into 8 pieces and roll each into a rope.
- Shape each rope into a pretzel.
- Bring water and baking soda to a gentle boil.
- Dip each pretzel briefly into the baking soda water.
- Place on a lined baking sheet.
- Brush with beaten egg and sprinkle with coarse salt.
- Bake until golden brown and fragrant.
- Bake until golden brown and fragrant.