Introduction
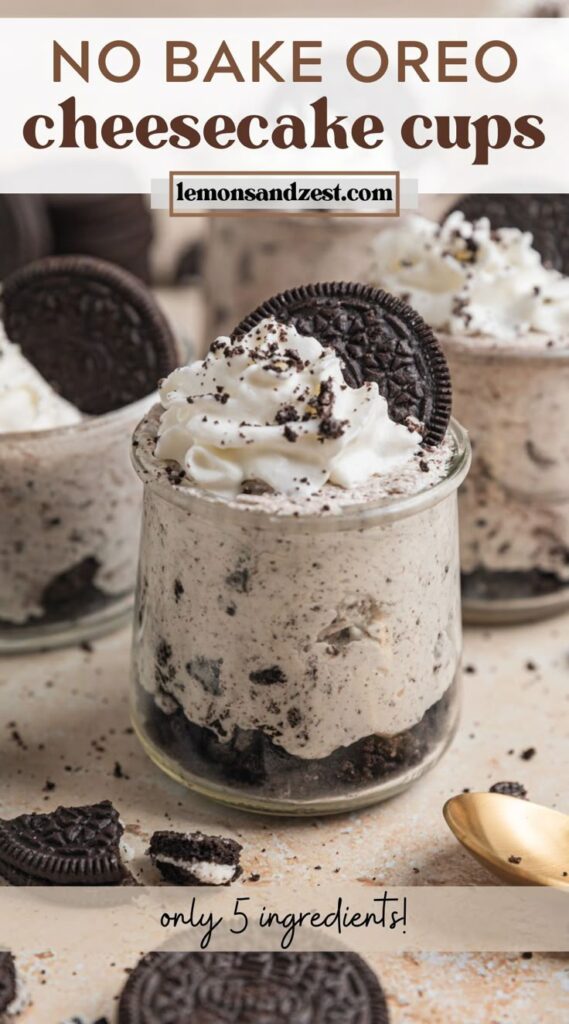
Need a simple dessert that looks impressive without turning on the oven? Oreo No-Bake Cheesecake Cups are layered treats made with creamy cheesecake filling and crunchy chocolate cookie crumbs, all served in individual cups. They are cool, rich, and wonderfully easy to prepare ahead of time. These little desserts fit perfectly into family movie nights, holiday gatherings, casual get-togethers, or evenings when you want something sweet without a lot of effort. The creamy filling pairs beautifully with the cookie layers, creating a dessert that feels comforting and special. I always like keeping a batch chilled in the refrigerator for an easy treat later.
Why You Will Love This Recipe
Looking for a dessert that comes together without baking? This recipe keeps things easy while still delivering plenty of flavor and texture. The smooth cheesecake filling contrasts beautifully with the crunchy cookie crumbs, creating a dessert that feels satisfying in every spoonful.
Want something that works well for both everyday treats and celebrations? These cheesecake cups are crowd-pleasing, budget-friendly, and easy to prepare ahead. They fit beautifully into busy schedules because most of the work happens before chilling. Leftovers store well, making them perfect for enjoying over several days. Since each serving is made individually, they’re easy to scale for two people or a larger group. Their cozy, make-ahead appeal makes them a recipe many Pinterest users save for later.
Ingredients
For the best texture, use full-fat cream cheese softened to room temperature.
- 16 Oreo-style chocolate sandwich cookies, crushed
- 3 tablespoons unsalted butter, melted
- 8 ounces cream cheese, softened
- 1 cup heavy whipping cream
- ⅓ cup powdered sugar
- 1 teaspoon vanilla extract
- 4 additional Oreo-style cookies, crushed for topping
For 2 people, simply prepare about half the ingredients. For more than 4 people, increase all ingredients evenly and prepare additional serving cups.
Instructions
Step 1: Preparation
Crush the cookies into fine crumbs and combine them with melted butter. Divide most of the mixture among four serving cups, pressing lightly to create the first layer. Reserve a small amount for topping later. Prepare all remaining ingredients before mixing.
Step 2: Main Cooking Process
In a large bowl, beat the softened cream cheese, powdered sugar, and vanilla until smooth and creamy. In a separate bowl, whip the cream until soft peaks form. The mixture should look fluffy and light without becoming stiff.
Step 3: Combining Ingredients
Fold the whipped cream gently into the cream cheese mixture until fully blended. Spoon or pipe the filling into each cup over the cookie layer. Add another light sprinkle of cookie crumbs between layers if desired for extra texture.
Step 4: Finishing & Final Simmer
Top each cup with the reserved cookie crumbs and chill for at least 2 hours. The filling will become thicker and creamier as it rests. For larger batches, simply prepare more cups while keeping the same chilling time.
Why This Recipe Works for Busy Days
Need a dessert you can prepare ahead without stress? These cheesecake cups are ideal for meal prep because they can be assembled hours before serving. They stay fresh in the refrigerator, require no baking, and are easy to portion individually. Pinterest users often save recipes like this because they can make them now and enjoy them later.
Tips & Tricks
- Wondering why your filling seems lumpy? Always let the cream cheese soften before mixing. Cold cream cheese can leave small lumps throughout the filling. Whether making two servings or eight, starting with softened cream cheese helps create a smoother texture.
- Concerned about soggy cookie layers? Assemble the dessert only after the cookies are mixed with butter and ready to use. Letting the crumbs sit too long can reduce their crunch. The same approach works whether you’re preparing a small batch or a large party tray.
- Having trouble with neat layers? Use a piping bag or zip-top bag with the corner cut off. This helps create cleaner layers and a prettier presentation. If making extra servings, piping also speeds up assembly.
- Want extra flavor without extra effort? Add a pinch of salt to the cheesecake mixture. It helps balance the sweetness and enhances the chocolate cookie flavor. This small adjustment works well regardless of the number of servings.
Variations
Chocolate Lovers Version
Want even more chocolate flavor? Mix mini chocolate chips into the cheesecake filling before layering. The added texture pairs beautifully with the cookie crumbs and creates a richer dessert experience. Simply increase the amount proportionally when preparing a larger batch for gatherings.
Vegetarian Option
Need a dessert suitable for vegetarian guests? This recipe is naturally vegetarian when made with vegetarian-friendly sandwich cookies. Serve the cups with fresh berries for added color and freshness. The recipe remains easy to scale for both small and large groups.
Ingredient Swap
Missing heavy cream? Use a thick whipped topping instead. The texture will be slightly different but still creamy and enjoyable. This swap can be especially helpful when preparing dessert quickly or when serving a crowd with limited ingredients available.
Flavor Boost
Looking for a fresh twist? Add a little orange zest or a few drops of peppermint extract to the cheesecake filling. Both options bring extra flavor without changing the simple preparation process. Adjust the amount carefully, especially when preparing smaller portions.
Serving Suggestions
Fresh Berry Garnish
Want a brighter presentation? Top each cup with fresh strawberries or raspberries before serving. The fruit adds color and freshness while balancing the richness of the cheesecake filling. For larger gatherings, create a topping station so guests can customize their cups.
Coffee Break Treat
Need a cozy afternoon dessert? Serve these cups alongside coffee or hot chocolate. The creamy texture pairs wonderfully with warm drinks, creating a relaxing treat that feels special without requiring extra preparation.
Dessert Party Display
Hosting friends or family? Arrange the cups on a serving tray and finish each one with cookie crumbs just before serving. Individual portions make entertaining easy and allow you to prepare exactly the number of servings needed.
Family Movie Night
Looking for an easy evening dessert? Keep the cups chilled until snack time and serve straight from the refrigerator. Their grab-and-go style makes them perfect for casual family nights, and additional cups can easily be prepared for larger groups.
Storage Instructions
Fridge Storage
Need leftovers to stay fresh? Cover each cheesecake cup tightly with plastic wrap or a lid and store in the refrigerator. They will stay fresh for up to 4 days. Individual portions make it easy to enjoy one serving at a time.
Reheating
Wondering if these need warming? No reheating is necessary. These dessert cups are meant to be served cold. Simply remove them from the refrigerator a few minutes before serving for the creamiest texture.
Freezing
Want to save them longer? Freeze the assembled cups in freezer-safe containers for up to 1 month. Thaw overnight in the refrigerator before serving. Smaller portions thaw more quickly and are convenient for individual treats.
Make-Ahead Tips
Trying to plan ahead for an event? Prepare the cups a day before serving and keep them chilled. The flavors settle nicely overnight, and the dessert remains creamy and delicious. This is especially helpful when making multiple servings for parties.
Recipe Timing
Prep Time: 20 minutes
Cook Time: 0 minutes
Rest Time: 2 hours chilling
Total Time: 2 hours 20 minutes
Nutrition Information (Approximate)
Curious about the nutrition per serving? Each serving contains approximately 380–480 calories and 5–8 grams of protein. It also provides calcium from the dairy ingredients and small amounts of iron from the chocolate cookies. Values are estimates and may vary depending on ingredient brands and serving sizes.
FAQs
Can I make these a day ahead?
Yes. They actually taste even better after chilling overnight.
Why is my filling runny?
The whipped cream may have been under-whipped or the mixture may need more chilling time.
Can I use different cookies?
Yes. Chocolate, vanilla, or peanut butter sandwich cookies all work well.
What if my cheesecake filling seems too thick?
Fold in a small amount of additional whipped cream until the texture softens.
How long do they last in the refrigerator?
They stay fresh for up to 4 days when covered properly.
Can I make fewer servings?
Yes. Simply use about half the ingredients to prepare 2 servings.
Conclusion
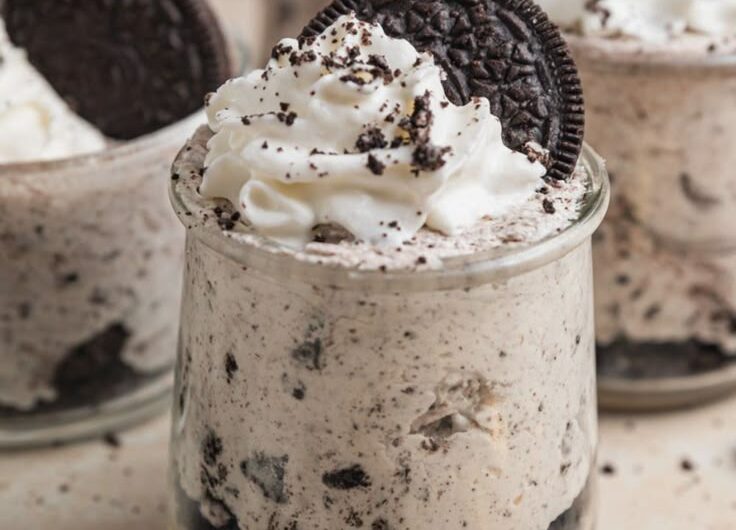
Need a dessert that feels special without requiring much effort? These creamy cheesecake cups combine crunchy cookie layers with a smooth filling for a dessert that is simple, comforting, and easy to prepare ahead. They work beautifully for family gatherings, casual celebrations, or quiet evenings when something sweet sounds perfect. The recipe is flexible enough for small households and easy to scale for larger groups. Oreo No-Bake Cheesecake Cups | Lemons + Zest is the kind of treat you’ll be glad to keep in your collection whenever you need a chilled dessert that everyone enjoys.
Oreo No-Bake Cheesecake Cups | Lemons + Zest
4
servings20
minutes480
kcalCreamy cheesecake filling layered with chocolate cookie crumbs and chilled until perfectly set. A simple no-bake dessert that’s easy to prepare and fun to serve.
Ingredients
16 Oreo-style chocolate sandwich cookies, crushed
3 tablespoons unsalted butter, melted
8 ounces cream cheese, softened
1 cup heavy whipping cream
⅓ cup powdered sugar
1 teaspoon vanilla extract
4 additional Oreo-style cookies, crushed for topping
Directions
- Crush the cookies and mix with melted butter.
- Divide most of the crumbs among four serving cups.
- Beat cream cheese, powdered sugar, and vanilla until smooth.
- Whip the cream until soft peaks form.
- Fold the whipped cream into the cream cheese mixture.
- Spoon or pipe the filling into the cups.
- Add extra cookie crumbs between layers if desired.
- Top with the remaining crushed cookies.
- Chill for at least 2 hours.
- Serve cold and enjoy.