Introduction
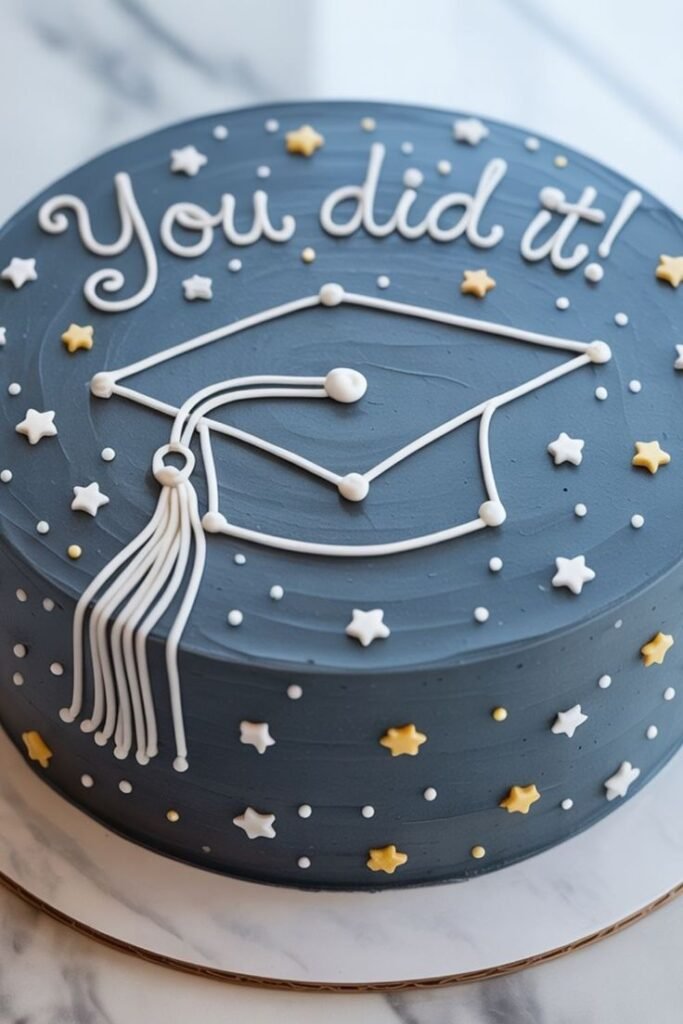
Need a sweet way to celebrate a big milestone without baking a full-sized cake? Graduation Mini Cake Idea is a fun, personal dessert that feels special but stays simple to make. These little cakes are perfect for parties, dessert tables, or thoughtful homemade gifts that feel more meaningful than store-bought treats.
Want something I like making when celebrations feel a bit busy and emotional at the same time? I usually prepare these mini cakes when I want each guest to have their own little celebration piece. Graduation Mini Cake Idea works beautifully for small gatherings, family parties, or dessert setups where presentation matters as much as taste.
Why You Will Love This Recipe
Looking for a dessert that feels festive but not overwhelming? These mini cakes are soft, moist, and easy to decorate in a way that makes every piece feel personal and memorable. They bring that “special moment” feeling without needing advanced baking skills.
Need something practical for parties? You can bake everything ahead and decorate right before serving.
Want something budget-friendly? A simple cake batter turns into several individual desserts instead of one large cake.
Hoping for flexibility? Graduation Mini Cake Idea can be styled in different colors, flavors, and decorations to match any celebration theme.
Trying to serve a crowd? Each mini cake is already portioned, so there’s no slicing or mess during the party.
Ingredients
Want the softest texture? Use room-temperature eggs and fresh baking powder for a light, fluffy cake base.
- 2 cups all-purpose flour
- 1 cup sugar
- 1/2 cup unsalted butter, softened
- 2 large eggs
- 1 cup milk
- 2 teaspoons baking powder
- 1 teaspoon vanilla extract
- 1/4 teaspoon salt
- 1 cup whipped cream or frosting (for decorating)
- Food coloring or sprinkles for decoration
For 2 people, bake half the batter. For more than 4 people, double the recipe and bake in batches using extra molds or pans.
Instructions
Step 1: Preparation
Need a smooth start for baking? Preheat the oven to 350°F (175°C) and line mini cake molds or a muffin tray. Whisk flour, baking powder, and salt together so the base bakes evenly and feels soft and light later.
Step 2: Main Cooking Process
Want a fluffy cake texture? Cream butter and sugar until pale and soft, then add eggs one at a time. Stir in vanilla and milk, then gently fold in the dry ingredients until the batter looks smooth and slightly thick.
Step 3: Combining Ingredients
Not sure how to portion the batter? Spoon it evenly into mini molds, filling each about two-thirds full. This helps them rise properly without spilling over, especially when doubling the recipe for a larger group.
Step 4: Finishing & Final Simmer
Want perfectly baked mini cakes? Bake for 15 to 18 minutes until golden and springy to the touch. Let them cool fully before decorating so the frosting holds its shape and doesn’t melt.
Why This Recipe Works for Busy Days
Need a dessert that feels planned without last-minute stress? These mini cakes can be baked a day ahead and decorated just before serving. They stay soft, travel well, and make party setup easier since each portion is already ready to go. It’s a simple way to enjoy celebrations without rushing in the kitchen.
Tips & Tricks
- Want evenly baked mini cakes? Always preheat the oven fully before baking. If making a double batch for a bigger group, rotate trays halfway through so every cake rises evenly and avoids uneven browning.
- Is your cake turning dense? Be careful not to overmix once flour is added. Stop as soon as the batter looks smooth. When scaling for fewer servings, keep mixing gentle so texture stays light.
- Need cleaner decoration? Wait until cakes are completely cool before adding frosting. Warm cakes will melt decorations quickly, especially when preparing a large batch for parties.
- Planning different flavors? Divide the batter before baking and add cocoa or fruit extracts. This works well for both small and large servings without changing the base recipe.
Variations
Meaty Version
Want a savory celebration twist? While unusual for desserts, you can create a themed party tray by pairing mini cakes with savory sliders or bites. This keeps the focus on contrast for mixed-party food tables when serving larger groups.
Vegetarian Option
Need a simple plant-based version? This recipe is already vegetarian-friendly. Just decorate with dairy-free whipped topping or frosting for a fully vegetarian celebration dessert.
Ingredient Swap
Out of butter? Use neutral oil for a slightly softer texture. You can also replace milk with almond or oat milk without changing the overall structure of the cakes.
Flavor or Herb Boost
Want a unique celebration flavor? Add lemon zest, almond extract, or a touch of cinnamon to the batter. These small changes make each mini cake feel special while keeping preparation simple.
Serving Suggestions
- Party Dessert Table
Need something visually appealing? Arrange mini cakes on a tiered stand for graduation parties. Each guest can easily grab one, and it works well whether you’re serving four people or a much larger group. - Gift-Style Boxes
Want a personal touch? Place individual mini cakes in small boxes for thoughtful homemade gifts that feel meaningful and festive. - Ice Cream Pairing
Looking for extra indulgence? Serve warm mini cakes with a scoop of vanilla ice cream for a cozy dessert plate. - Themed Celebration Setup
Planning a graduation party? Decorate each cake in school colors and arrange them as part of a themed dessert display for a fun, memorable table.
Storage Instructions
- Fridge Storage
Need to store leftovers safely? Keep decorated or plain mini cakes in an airtight container in the refrigerator for up to 4 days. If storing a larger batch, place parchment between layers to protect decorations. - Reheating
Want them soft again? Warm plain mini cakes in the microwave for 10–15 seconds. Avoid reheating decorated cakes so the frosting keeps its shape. - Freezing
Planning ahead for a big event? Freeze unfrosted mini cakes for up to 2 months. Wrap each one individually so they stay fresh, especially when preparing multiple batches. - Make-Ahead Tips
Short on party-day time? Bake the cakes 1–2 days ahead and store them covered. Decorate just before serving to keep everything fresh and picture-ready.
Recipe Timing
- Prep Time: 15 minutes
- Cook Time: 18 minutes
- Rest Time: 20 minutes cooling
- Total Time: 53 minutes
Nutrition Information (Approximate)
Need a quick estimate? Each mini cake contains about 220–280 calories and 4–6 grams of protein. These values may vary depending on frosting and decoration choices. They also provide small amounts of calcium and carbohydrates for energy, making them a balanced occasional treat.
FAQs
Can I make these ahead of time?
Yes, bake them a day or two in advance and decorate later.
Why are my mini cakes dry?
They may have been overbaked or overmixed.
Can I use oil instead of butter?
Yes, oil works for a softer texture.
What if the batter is too thick?
Add a small splash of milk until smooth.
How should I store them?
Keep in the fridge in an airtight container.
Can I change the flavor?
Yes, add extracts like lemon or almond.
Conclusion
Need a dessert that feels personal, fun, and easy to share? Graduation Mini Cake Idea is a simple way to turn an important day into something sweet and memorable. These little cakes are soft, customizable, and perfect for decorating in any theme you like.
Want to make them your own? Try different flavors, colors, or toppings depending on the celebration. Whether you’re baking for a small family moment or a bigger party, these mini cakes bring a warm, homemade touch that fits any table beautifully.
Graduation Mini Cake Idea
4
servings15
minutes18
minutes280
kcalSoft and fluffy mini cakes perfect for graduation celebrations. Easy to bake, decorate, and serve as individual portions for parties or gifts.
Ingredients
2 cups all-purpose flour
1 cup sugar
1/2 cup unsalted butter, softened
2 large eggs
1 cup milk
2 teaspoons baking powder
1 teaspoon vanilla extract
1/4 teaspoon salt
1 cup whipped cream or frosting
Food coloring or sprinkles for decoration
Directions
- Preheat oven to 350°F (175°C) and prepare mini molds.
- Mix flour, baking powder, and salt in a bowl.
- Cream butter and sugar, then add eggs and vanilla.
- Mix in milk and dry ingredients until smooth.
- Fill mini molds two-thirds full.
- Bake for 15–18 minutes.
- Cool completely before decorating.