Introduction
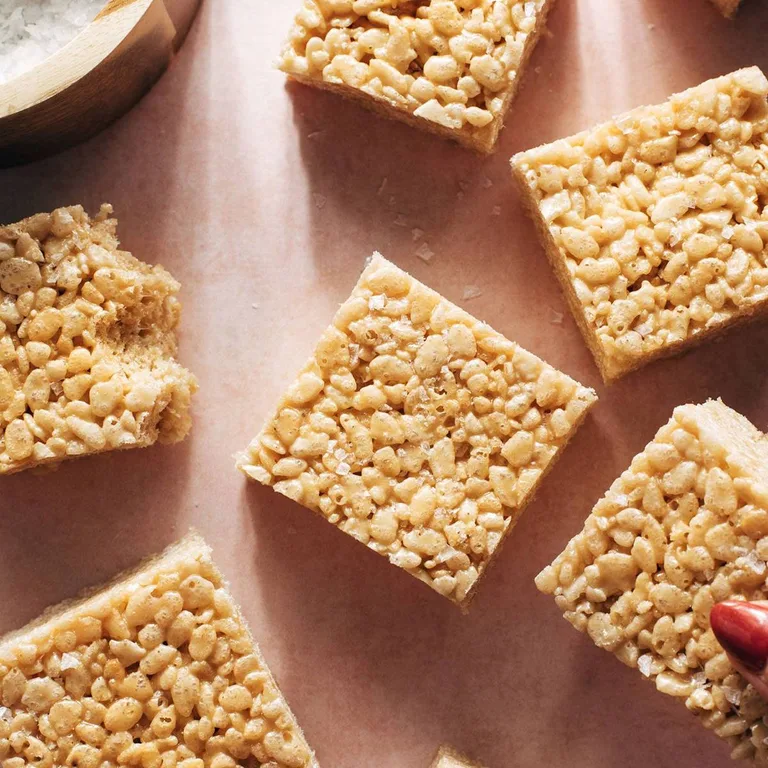
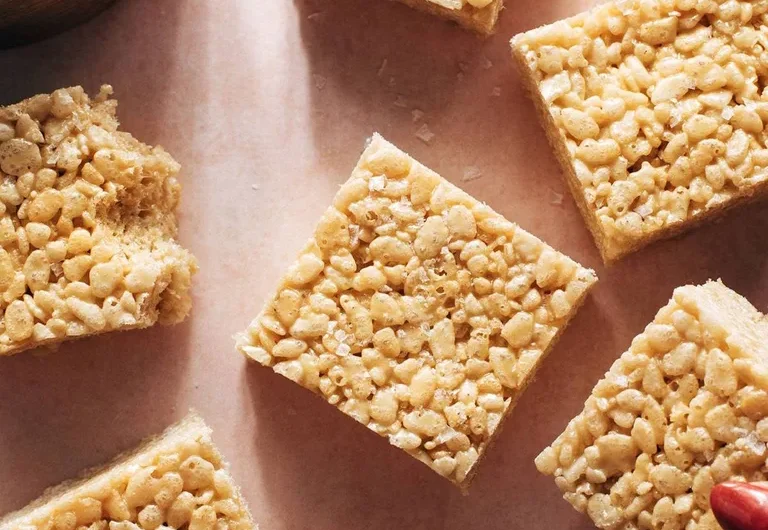
Need a dessert that comes together without turning on the oven for long? Salted Caramel Rice Krispie Bars are a sweet, crunchy treat layered with buttery caramel flavor and a touch of salt that keeps every bite balanced. They combine the familiar crisp texture people love with a richer flavor that feels a little more special. These bars are wonderful for family gatherings, after-school snacks, holiday trays, or cozy evenings when you want something homemade without spending hours in the kitchen. The recipe uses simple ingredients, requires very little effort, and delivers satisfying results every time. I often reach for this recipe when I need a dependable dessert that everyone enjoys.
Why You Will Love This Recipe
Looking for a dessert that feels homemade but doesn’t require complicated baking skills? These bars are incredibly simple to prepare and rely on ingredients that many people already keep in the pantry. The combination of crispy cereal, smooth caramel, and a light salty finish creates a flavor that feels comforting and memorable.
Need something flexible for different occasions? These treats work just as well for casual family snacks as they do for parties and holiday dessert tables. They travel easily, slice neatly, and stay delicious for several days.
Trying to make a budget-friendly dessert? A handful of affordable ingredients creates a generous batch that serves four people comfortably and can easily be expanded for larger gatherings.
Want a recipe worth saving? Salted Caramel Rice Krispie Bars are crowd-pleasing, freezer-friendly, cozy, and perfect for making ahead whenever a sweet craving appears.
Ingredients
Tip: Fresh crispy rice cereal gives the bars their best crunch and helps prevent a stale texture.
- 6 cups crispy rice cereal
- 4 tablespoons unsalted butter
- 1 package (10 ounces) mini marshmallows
- ½ cup salted caramel sauce
- ½ teaspoon vanilla extract
- ¼ teaspoon flaky sea salt, plus extra for topping
- Nonstick spray or extra butter for the pan
For 2 people, prepare about half the ingredients and use a smaller pan. For more than 4 people, double the ingredients and use a larger baking dish.
Instructions
Step 1: Preparation
Need a smoother cleanup later? Lightly grease an 8-inch square baking dish and set it aside. Measure the cereal, caramel sauce, and remaining ingredients before starting so everything is ready once the marshmallow mixture is melted.
Step 2: Main Cooking Process
Worried about the mixture becoming too firm? Melt the butter in a large saucepan over low heat. Add the marshmallows and stir gently until completely smooth. Mix in the caramel sauce, vanilla extract, and sea salt until glossy.
Step 3: Combining Ingredients
Concerned about crushing the cereal? Remove the saucepan from the heat and immediately add the crispy rice cereal. Fold carefully until every piece looks lightly coated and the mixture appears evenly combined throughout.
Step 4: Finishing & Final Simmer
Not sure how firmly to press the bars? Transfer the mixture into the prepared dish and gently press it into an even layer. Sprinkle extra flaky sea salt on top and allow the bars to cool completely before slicing. Larger batches may need extra cooling time.
Why This Recipe Works for Busy Days
Need a dessert that fits into a packed schedule? These bars require very little preparation and come together in one pot. They can be made ahead, packed for lunches, or stored for later snacking. Many Pinterest users save recipes like this because they offer homemade comfort without requiring complicated baking steps or lengthy cleanup afterward.
Tips & Tricks
- Wondering why some cereal bars become hard instead of chewy? Avoid pressing the mixture too firmly into the pan. Gentle pressure helps maintain a softer texture. If making a smaller batch for two people, use a smaller dish to keep the bars thick and chewy.
- Concerned about sticky mixing tools? Lightly grease your spatula or hands before pressing the mixture into the pan. This simple step prevents sticking and creates a smoother surface. The same trick works whether making four servings or a larger batch.
- Struggling with uneven caramel flavor? Stir the caramel completely into the melted marshmallow mixture before adding the cereal. This ensures every bite tastes balanced. When doubling the recipe, take extra care to mix thoroughly before transferring to the pan.
- Looking for cleaner slices? Allow the bars to cool completely before cutting. Rushing this step can create uneven edges and messy portions. For larger gatherings, chill briefly before slicing into neat squares for serving.
Variations
Meaty Version
Looking for a sweet-and-savory twist? Sprinkle a small amount of finely crumbled crispy bacon over the top before the bars set. The smoky flavor pairs surprisingly well with the caramel and salt. This variation is especially popular when serving a larger crowd.
Vegetarian Option
Need a fully vegetarian dessert? Simply use vegetarian-friendly marshmallows and prepare the recipe as written. The texture remains chewy and satisfying, while the caramel flavor continues to shine. This option works perfectly for family gatherings and everyday treats alike.
Ingredient Swap
Missing salted caramel sauce? Use regular caramel sauce and add an extra pinch of flaky sea salt. You can also swap vanilla extract for maple extract to create a slightly different flavor profile. The recipe adjusts easily for smaller or larger serving sizes.
Flavor or Herb Boost
Want a little extra depth? Add a pinch of cinnamon or a small amount of orange zest to the melted mixture. These additions create a subtle flavor change without overpowering the caramel. Adjust amounts naturally when increasing the recipe for more people.
Serving Suggestions
- Coffee Break Plate
Need an easy afternoon treat? Serve the bars alongside coffee, tea, or hot chocolate. The sweet caramel flavor pairs beautifully with warm drinks and creates a cozy snack that feels special without requiring extra effort. - Dessert Board
Looking for a party-friendly presentation? Arrange sliced bars on a platter with fresh fruit, pretzels, and chocolate pieces. This setup feels inviting and can easily be expanded for larger gatherings or celebrations. - Lunchbox Treat
Want a simple make-ahead snack? Wrap individual squares and tuck them into lunchboxes or snack containers. They hold their shape well and make a satisfying sweet addition to busy days. - Ice Cream Companion
Hoping to dress up dessert night? Serve a square alongside vanilla ice cream and a drizzle of extra caramel sauce. This simple pairing feels cozy and works well for both small family meals and larger occasions.
Storage Instructions
- Fridge Storage
Wondering how to keep the bars fresh? Store them in an airtight container for up to 5 days. Separate layers with parchment paper to prevent sticking. Smaller portions can be wrapped individually for quick snacks throughout the week. - Reheating
Concerned about bars becoming too firm? Let refrigerated bars sit at room temperature for a few minutes before serving. This helps restore some softness. Larger portions can be arranged on a plate and allowed to warm naturally. - Freezing
Need a dessert ready for future cravings? Wrap individual bars tightly and freeze for up to 2 months. Thaw at room temperature before enjoying. Smaller portions are especially convenient when you only need a quick sweet treat. - Make-Ahead Tips
Trying to prepare desserts in advance? Make the bars one or two days before serving and store them covered at room temperature. This allows the flavors to settle while keeping the texture pleasantly chewy.
Recipe Timing
Prep Time: 10 minutes
Cook Time: 10 minutes
Rest Time: 30 minutes
Total Time: 50 minutes
Nutrition Information (Approximate)
Curious about what each serving contains? One serving provides approximately 320–420 calories and 2–4 grams of protein. The bars also contain small amounts of iron from the cereal and calcium from dairy ingredients. Nutritional values are estimates and may vary depending on ingredient brands and serving sizes.
FAQs
Can I make these bars ahead of time?
Yes. They can be prepared one or two days before serving.
What is the most common mistake?
Pressing the mixture too firmly can make the bars dense and hard.
Can I substitute the caramel sauce?
Yes. Regular caramel sauce with extra sea salt works well.
Why are my bars falling apart?
The marshmallow mixture may not have been mixed evenly with the cereal.
How should I store leftovers?
Keep them in an airtight container for up to 5 days.
How can I increase the salted caramel flavor?
Add a little extra caramel drizzle and a light sprinkle of flaky sea salt on top.
Conclusion
Need a dessert that delivers big flavor with very little effort? Salted Caramel Rice Krispie Bars combine crisp texture, buttery sweetness, and just enough salt to keep every bite interesting. They are easy to customize, simple to store, and perfect for everything from family movie nights to holiday dessert tables. Whether you make them ahead for a gathering or keep a batch ready for sweet cravings during the week, they are the kind of treat people reach for again and again. Save this recipe and enjoy a cozy homemade dessert whenever the mood strikes.
Salted Caramel Rice Krispie Bars
4
servings10
minutes10
minutes420
kcalThese chewy, crispy bars combine buttery marshmallows, rich caramel, and a touch of sea salt. They are easy to make and perfect for sharing with family and friends.
Ingredients
6 cups crispy rice cereal
4 tablespoons unsalted butter
1 package (10 ounces) mini marshmallows
½ cup salted caramel sauce
½ teaspoon vanilla extract
¼ teaspoon flaky sea salt, plus extra for topping
Nonstick spray or extra butter for the pan
Directions
- Lightly grease an 8-inch square baking dish.
- Melt the butter in a large saucepan over low heat.
- Add the marshmallows and stir until completely melted.
- Stir in the caramel sauce, vanilla extract, and sea salt.
- Remove from the heat and fold in the crispy rice cereal.
- Mix until the cereal is evenly coated.
- Transfer the mixture to the prepared dish and gently press into an even layer.
- Sprinkle extra flaky sea salt over the top.
- Let cool completely before slicing and serving.